
Installing Nextcloud on Ubuntu 20.04 Server
There are already a lot of guide on the internet about how to install Nextcloud on an Ubuntu Server. The problem is all of them guide on how to “install” Nextcloud and not on how to “securely install” Nextcloud. Today we’ll install nextcloud following good security practices.
What we will learn today
- Installing required packages
- Setting up database
- Downloading and extracting nextcloud
- Web server configuration
- PHP-FPM configuration
- Installing Nextcloud
- Installing SSL certificates
- Additional configuration
Installing required packages
First install the required packages by issuing the followings commands:-
apt update && apt upgrade
apt install apache2 mariadb-server php7.4-fpm
apt install imagemagick php7.4-gd php7.4-mysql php7.4-curl php7.4-mbstring php7.4-intl
apt install php7.4-gmp php7.4-bcmath php-imagick php7.4-xml php7.4-apcu php7.4-zip
Setting up database
First, start the mysql server.
/etc/init.d/mysql startNext, secure the default mysql installation with the following command and answering the questions that follow:-
mysql_secure_installationThen start mysql command line with the following command:-
mysql -u root -pOn the MariaDB prompt enter the following commands by replacing “username” and “password” with an username with password of your choice:-
CREATE USER 'username'@'localhost' IDENTIFIED BY 'password';
CREATE DATABASE IF NOT EXISTS nextcloud CHARACTER SET utf8mb4 COLLATE utf8mb4_general_ci;
GRANT ALL PRIVILEGES ON nextcloud.* TO 'username'@'localhost';
FLUSH PRIVILEGES;
exit;
Downloading and extracting nextcloud
- Go to the Nextcloud Download Page.
- Next click on Download for server and then click on Details and download options
- Right click and copy the link to the
.tar.bz2file. - In command line use
wgetto download the file from the copied link
wget https://download.nextcloud.com/server/releases/nextcloud-x.y.z.tar.bz2Note:- You can also download the zip file.
- Next download the MD5 and SHA256 checksum files from links available.
wget https://download.nextcloud.com/server/releases/nextcloud-x.y.z.tar.bz2.md5
wget https://download.nextcloud.com/server/releases/nextcloud-x.y.z.tar.bz2.sha256- Verify the MD5 and SHA256 sum:
md5sum -c nextcloud-x.y.z.tar.bz2.md5 < nextcloud-x.y.z.tar.bz2
sha256sum -c nextcloud-x.y.z.tar.bz2.sha256 < nextcloud-x.y.z.tar.bz2- Next, extract the .tar.bz2 file and copy nextcloud to the document root of the apache webserver.
tar -xjvf nextcloud-x.y.z.tar.bz2
cp -r nextcloud /var/www
Web server configuration
In Ubuntu we need to create a single Apache configuation file which is /etc/apache2/sites-available/nextcloud.conf. Note, I’ll be installing Nextcloud to its own subdomain, for e.g, https://cloud.mysitena.me using the virtual host installation method. You can also install nextcloud to a subdirectory using the directory-based installation method. Create the /etc/apache2/sites-available/nextcloud.conf file with the following contents:-
<VirtualHost *:80>
  DocumentRoot /var/www/nextcloud/
  ServerName  cloud.mysitena.me

  <Directory /var/www/nextcloud/>
    Require all granted
    AllowOverride All
    Options FollowSymLinks MultiViews

    Satisfy Any
    <IfModule mod_dav.c>
      Dav off
    </IfModule>

  </Directory>
    ErrorLog ${APACHE_LOG_DIR}/nc_error.log
    CustomLog ${APACHE_LOG_DIR}/nc_access.log common

</VirtualHost>
Next, enable the Nextcloud website.
a2ensite nextcloud.confWe also need to enable some Apache modules for Nextcloud to work properly. Use the following command to enable the required modules:-
a2enmod rewrite env dir mpm_event proxy_fcgi mime setenvif ssl headersPHP-FPM configuration
PHP-FPM or PHP FastCGI Process Manager is an alternative PHP FastCGI implementation which is useful for heavy traffic sites. PHP-FPM helps in increasing the performance, stability and security while being very flexible in configuration. As we’ll be doing a multisite installation on our server, we’ll be using PHP-FPM pools for each website for increased performance, process isolation and security. To better explain the increased security by creating separate PHP-FPM pools I’ll also be downloading and extracting WordPress as a demo. Use the following commands to download and extract WordPress to webroot:-
curl -O https://wordpress.org/latest.tar.gz
tar xzvf latest.tar.gz
cp -r wordpress /var/www
Next, follow the below steps carefully.
- Create separate users for each Site
We’ve to run WordPress and Nextcloud via different users as using the default Apache user www-data will lead to compromise of both Nextcloud and WordPress in the event one of them gets hacked. We’ll create two users and add www-data user to their respective groups. This will allow the users to interact with the Apache webserver and vice-versa. Use the following commands to create the users and add www-data to their groups:-
useradd -d /var/www/nextcloud -s /usr/sbin/nologin nc_user
useradd -d /var/www/wordpress -s /usr/sbin/nologin wp_user
usermod -a -G nc_user www-data
usermod -a -G wp_user www-data
Checking the groups of each user we’ll see the following:-

- Use separate directory permissions
We need to assign right permissions so that each user cannot access the other user’s folder. Use the following commands:-
chown -R nc_user:nc_user /var/www/nextcloud
chmod 770 /var/www/nextcloud
chown -R wp_user:wp_user /var/www/wordpress
chmod 770 /var/www/wordpress
Now, if we try to use wp_user to read Nextcloud folder and nc_user to read WordPress folder we’ll see that permission is denied.

- Create Separate PHP-FPM pools for the users
Use the following commands to create the pools:-
cp /etc/php/7.4/fpm/pool.d/www.conf /etc/php/7.4/fpm/pool.d/fpm-nextcloud.conf
cp /etc/php/7.4/fpm/pool.d/www.conf /etc/php/7.4/fpm/pool.d/fpm-wordpress.conf
Next, delete the default pool.
rm /etc/php/7.4/fpm/pool.d/www.conf- Configure the pools
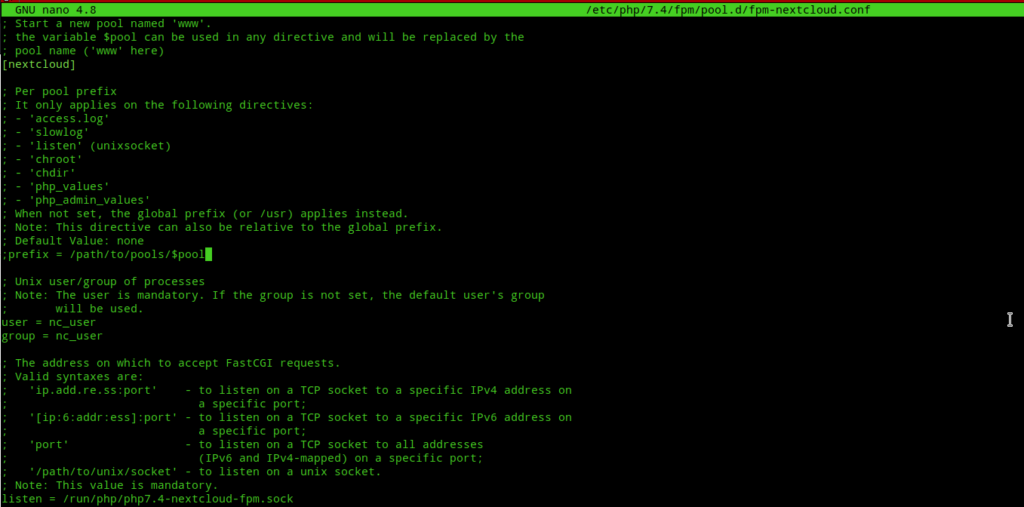
Open the pool configuration file in a text editor:-
nano /etc/php/7.4/fpm/pool.d/fpm-nextcloud.confChange the following:-
- Change the first uncommented line with [www] to [nextcloud]
- Change the uncommented user and group variables value to nc_user.
- Change the value of uncommented
listen =to/run/php/php7.4-nextcloud-fpm.sock
It should look something like the image below:-
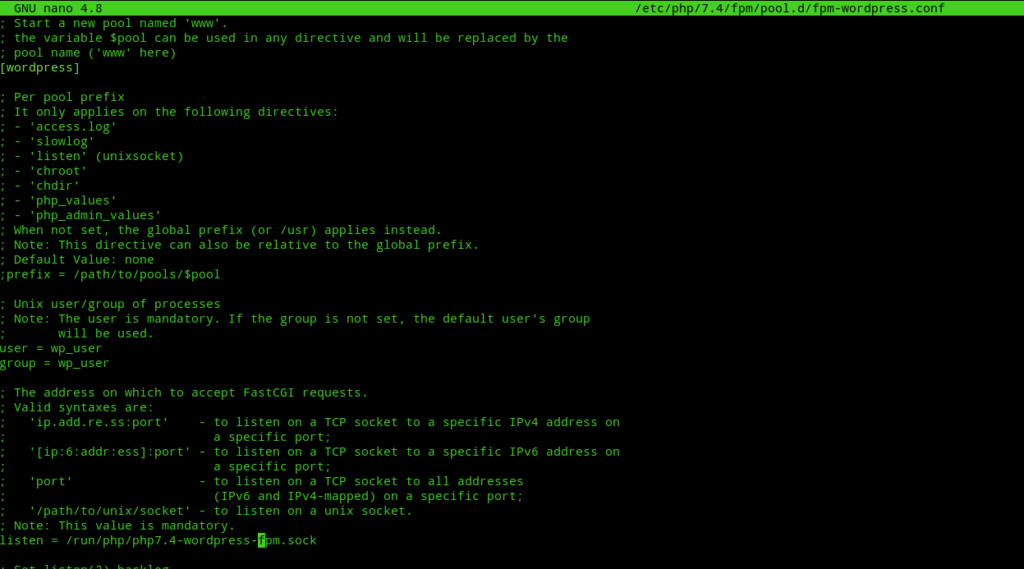
Repeat the same for the WordPress wp_user and fill the fields accordingly.
- Add Apache configuration to access PHP-FPM pools
Edit the nextcloud Apache vhost config /etc/apache2/sites-available/nextcloud.conf to look like the following:-
<VirtualHost *:80>
  DocumentRoot /var/www/nextcloud/
  ServerName  cloud.mysitena.me

  <FilesMatch \.php$>
        SetHandler "proxy:unix:/run/php/php7.4-nextcloud-fpm.sock|fcgi://cloud.mysitena.me/"
  </FilesMatch>


  <Directory /var/www/nextcloud/>
    Require all granted
    AllowOverride All
    Options FollowSymLinks MultiViews

    Satisfy Any
    <IfModule mod_dav.c>
      Dav off
    </IfModule>

  </Directory>
    ErrorLog ${APACHE_LOG_DIR}/nc_error.log
    CustomLog ${APACHE_LOG_DIR}/nc_access.log common

</VirtualHost>
Note:- Don’t forget to replace cloud.mysitena.me with your domain name.
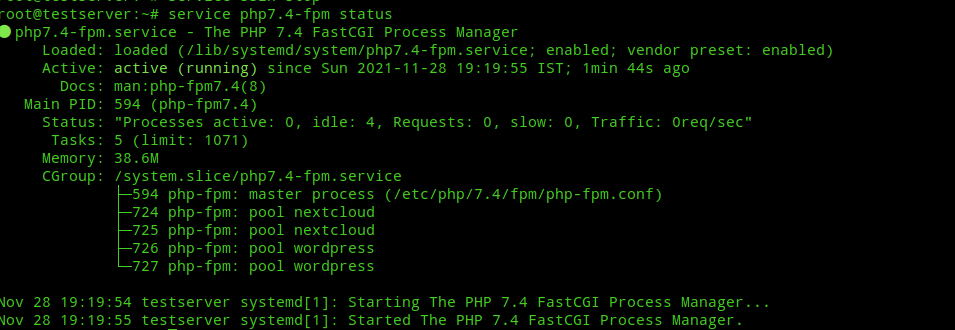
- Start PHP-FPM service and restart Apache service
Use the following commands:-
service php7.4-fpm restart
service apache2 restart
The php-fpm pools should show up when you restart the service.
Installing Nextcloud
We’ll install nextcloud via the commandline with the help of Nextcloud occ command. Before installing nextcloud we need to change the default location of the data folder which will contain all our data. Use the following commands:-
mkdir /opt/data
chown -R nc_user:nc_user /opt/data/
Install nextcloud with the following commands:-
cd /var/www/nextcloud/
sudo -u nc_user php occ maintenance:install --database \
"mysql" --database-name "nextcloud" --database-user "username" --database-pass \
"password" --admin-user "admin" --admin-pass "password" \
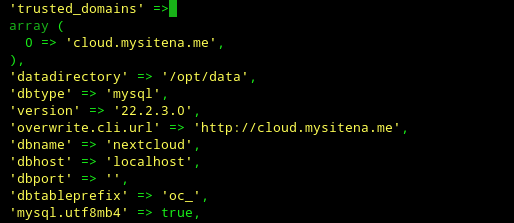
--data-dir "/opt/data"Don’t forget to change the admin name and password values and replace the database user and password with the values you choose earlier while creating the database. Next, we need to edit nextcloud config.php and add our Nextcloud domain as the trusted domain so that we can visit the website. Edit /var/www/nextcloud/config/config.php and edit the localhost value and replace it with your domain name:-
Installing SSL Certificates
If you’ve followed my guide on SSLH proxy, then you need to disable it first before trying to install a SSL certificate.
service sslh stopNext do a test-cert installation with certbot to avoid rate-limiting due to failed attempts. Use the following command and choose your cloud domain name when prompted:-
certbot --test-certIf the above command succeeds without any errors, then install a real certificate using the command:-
certbot --apache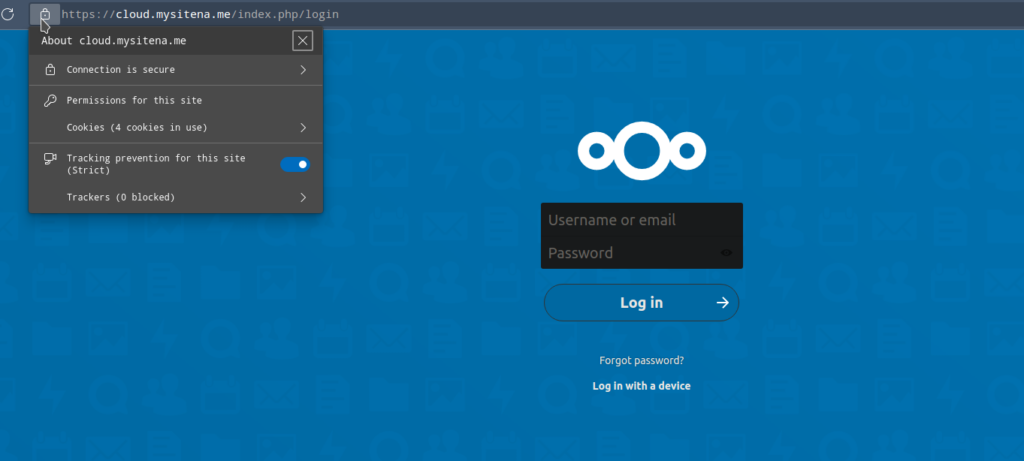
Next to enable SSLH proxy again we need to edit a couple of configuration files. First open /etc/apache2/ports.conf in a text editor and edit it to look like this:-
Listen 80

<IfModule ssl_module>
        Listen 4443
</IfModule>

<IfModule mod_gnutls.c>
        Listen 4443
</IfModule>
Then edit /etc/apache2/sites-available/nextcloud-le-ssl.conf and change the port number form 443 to 4443. Now, restart Apache and SSLH with the following commands:-
service apache2 restart
service sslh restart
Additional configuration
Next we need to enable Pretty URLs and a caching system so that our Nextcloud installation looks nice and performs better. Pretty URLs disable the index.php part for URLs in browsers.

To enable Pretty URLs edit the nextcloud config.php and edit/add the following two lines to look like this:-
'overwrite.cli.url' => 'http://cloud.mysitena.me',
'htaccess.RewriteBase' => '/',
Then run the following nextcloud occ command to update .htaccess file the with new configuration:-
sudo -u nc_user php /var/www/nextcloud/occ maintenance:update:htaccessNow, next time you visit your site the index.php part won’t show up.
Next, we need to enable PHP APCu data cache for nextcloud to function properly. We’ve already installed it, but just to be sure use the following command:-
apt install php7.4-apcuAfter php-apcu is installed edit /var/www/nextcloud/config/config.php and add the following line to it:-
'memcache.local' => '\\OC\\Memcache\\APCu',Then edit /etc/php/7.4/mods-available/apcu.ini and add the following line to it:-
apc.enable_cli=1Next restart Apache and login to your Nextcloud installation and go to Settings –> Administration –> Overview and check if any errors are shown. And so, we’ve successfully installed Nextcloud!