
OWASP Android UnCrackable Level 1
This is my first blog post related to Android Security. Today, I’ll be writing about two different solutions to solve the OWASP Uncrackable Level 1 Android app. For the first solution, I’ll be using the powerful Mobile Security Framework to solve the challenge, as it’ll be beginner friendly. Also, as we’ll use the snap package of MobSF, this’ll be a great chance for me to show off that I not only develop snap packages of InfoSec tools, but also know how they work both at a high level and at a code level(e.g, this PR). For the second solution, I’ll be using the Java Debugger(jdb) for runtime tampering with the Android app. So without further ado, let’s get started.
Note:- Instead of making two blog posts for this, I decided to cram both solutions into a single blog post. So, even though this blog post seems too long, it’s not!
Table of Contents
Solution 1: Using Mobile Security Framework
Installing required packages
First of all, I expect you’re using a Linux host and not running Linux in a VM. Running MobSF in a VM will work too, but you won’t be able to get the same level of performance as running on a Linux host. Next, you can install MobSF following official documentation, but I recommend installing the snap package of MobSF as it comes with a couple of tweaks of my own and works out of the box with emulators of both Android Studio and Genymobile Genymotion. To install the snap package, use the following command:-
snap install mobsfNext, to run MobSF you need to just type mobsf and it’ll run MobSF on localhost port 8000 and you can open it in your web browser. If you want to run it on a custom port, then you can use the following command:-
mobsf <ip>:<port>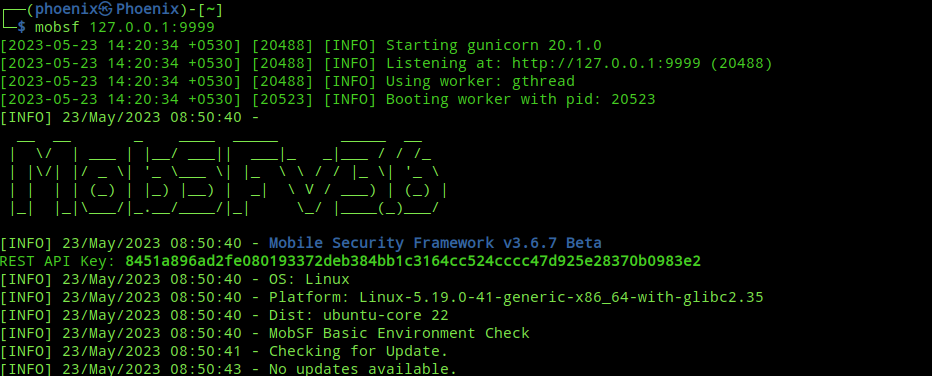
Uploading the APK for analysis
After you start MobSF you’ll land on a page like this:-
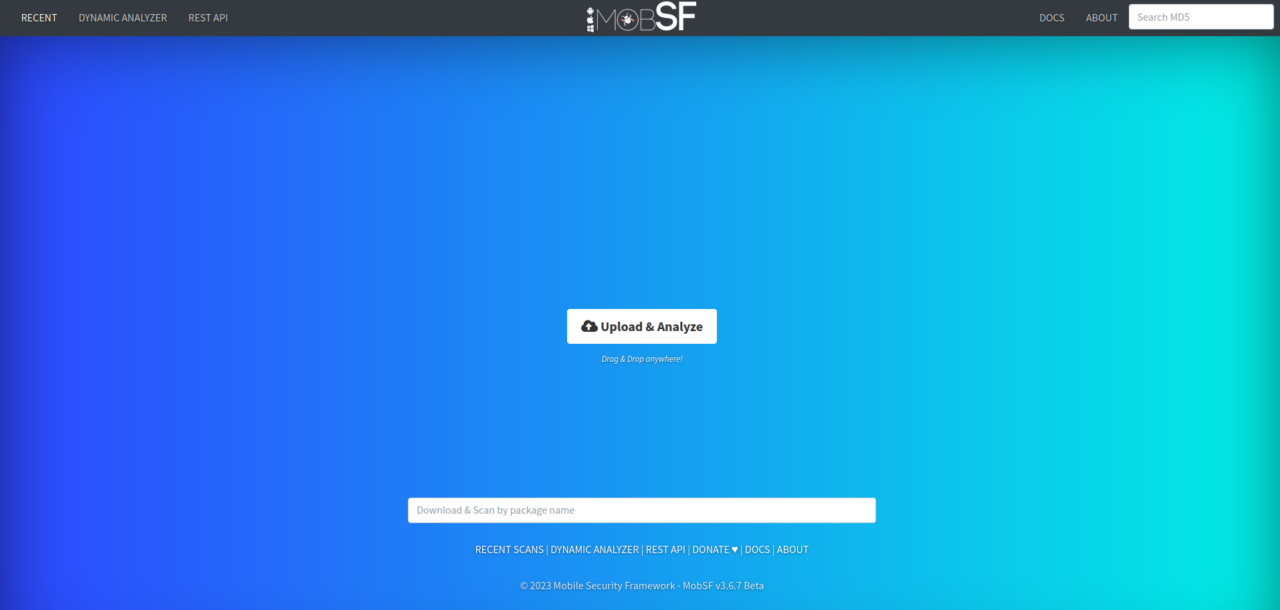
We need to download the OWASP UnCrackable-Level1.apk. To download it use the following command:-
wget https://raw.githubusercontent.com/OWASP/owasp-mastg/master/Crackmes/Android/Level_01/UnCrackable-Level1.apkNext, click on the “Upload & Analyze” button and upload the apk. MobSF will decompile the apk and do static analysis on it.
Static Code Analysis
After you upload the apk, you’ll land on a page like this:-
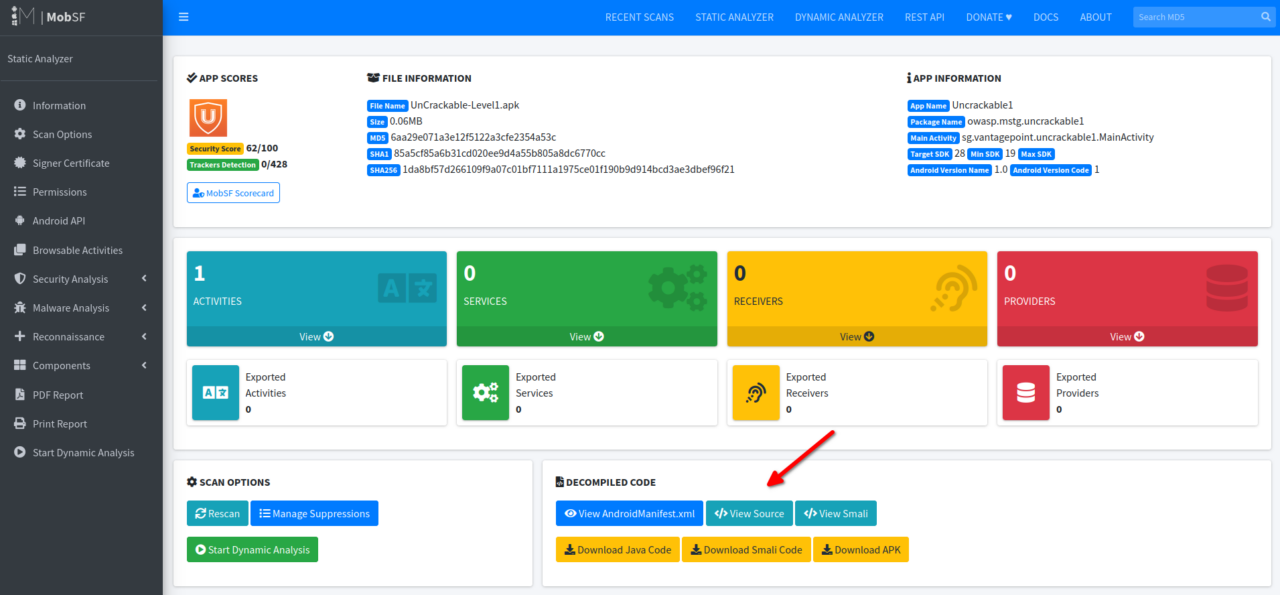
Under the DECOMPILED CODE section, click on “View Source” and you’ll land on a page for Java source code viewing. From now on, I’ll be explaining the source code and the exploit.
First of all, the UnCrackable-Level1.apk is a simple Android app and you’ve to just enter a string and click “VERIFY” in the app. If you entered the correct string, then you’ll see a “Success!” dialog otherwise it’ll ask you to try again. We’ve to figure out the correct string by auditing the Java source code and defeating the protection mechanisms in place for reversing it to our purpose. Now, don’t get worried about the reversing part, because it’s not as hard as reversing a Linux elf binary or Windows executable. The best thing about Android Reverse Engineering is that hackers have access to a wide range of open source tools to serve their purpose. Even though I’m using MobSF for this solution, I know of four other tools which can be used to solve this challenge.
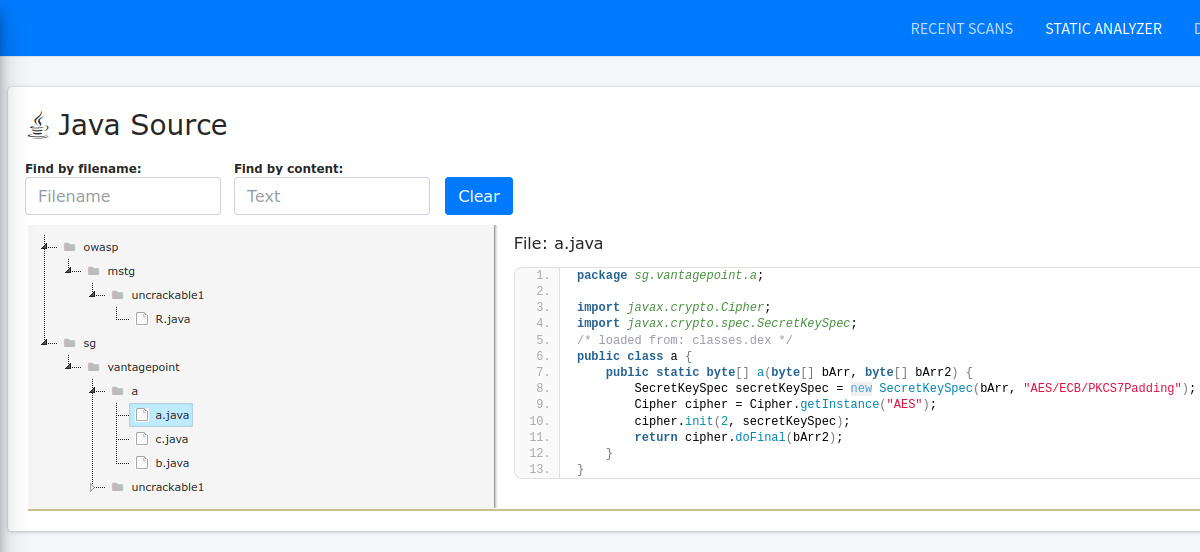
After reading the source code, I found the file a.java inside sg/vantagepoint/a folder contains the following code which is responsible for decrypting the string:-
package sg.vantagepoint.a;
import javax.crypto.Cipher;
import javax.crypto.spec.SecretKeySpec;
/* loaded from: classes.dex */
public class a {
    public static byte[] a(byte[] bArr, byte[] bArr2) {
        SecretKeySpec secretKeySpec = new SecretKeySpec(bArr, "AES/ECB/PKCS7Padding");
        Cipher cipher = Cipher.getInstance("AES");
        cipher.init(2, secretKeySpec);
        return cipher.doFinal(bArr2);
    }
}
Here in line 7, you can see that the SecretKeySpec class of Java is used to create a new Secret Key from “bArr” byte array(declared in line 6) using the “AES/ECB/PKCS7Padding” algorithm. Next in line 8, the getInstance method of Cipher class is used to implement “AES” encryption. Next, you should read the official documentaion of Cipher.init method to understand that “2” is the opmode which stands for “DECRYPT_MODE” which has a value of “2”(defined here). In short, the “init” method initiliazes this code in order to decrypt a byte array using the “secretKeySpec” secret key. Finally in line 10, the method doFinal performs the data decryption and the decrypted data is returned by the function. TL;DR, this function will provide us with the decrypted Secret String.
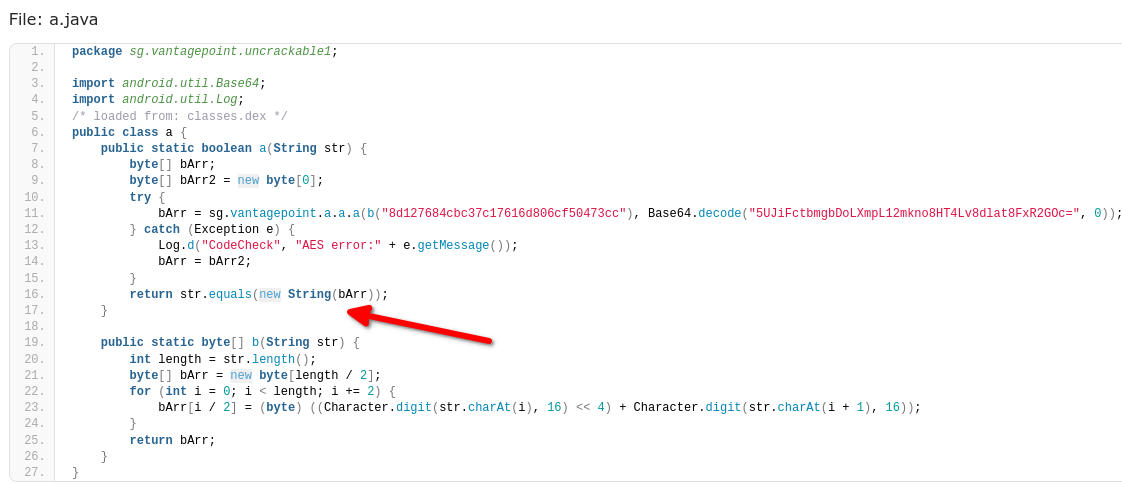
The above function is used to decrypt the Secret String in sg.vantagepoint.uncrackable1.a class’ a function and to compare with the string provided by user. Take a look at the try block in the code below, which uses the above decryption function, i.e. sg.vantagepoint.a.a.a(on line 10), to return the Secret String.
package sg.vantagepoint.uncrackable1;
import android.util.Base64;
import android.util.Log;
/* loaded from: classes.dex */
public class a {
    public static boolean a(String str) {
        byte[] bArr;
        byte[] bArr2 = new byte[0];
        try {
            bArr = sg.vantagepoint.a.a.a(b("8d127684cbc37c17616d806cf50473cc"), Base64.decode("5UJiFctbmgbDoLXmpL12mkno8HT4Lv8dlat8FxR2GOc=", 0));
        } catch (Exception e) {
            Log.d("CodeCheck", "AES error:" + e.getMessage());
            bArr = bArr2;
        }
        return str.equals(new String(bArr));
    }
Now that we know which code is responsible for returning(decrypting) the Secret String, think that wouldn’t it be nice if we can hook that function and inject some code into it to provide us with the decrypted string? Yep, that’d be awesome! Now, again Android Reverse Engineers have a mighty handy tool to help them achieve this task, i.e, Frida! Now, you may ask, “So what is Frida, exactly?” In short, Frida is a dynamic code instrumentation toolkit which allows us to hook functions of Android apps and inject JavaScript code into them. Frida has it’s own JavaScript API which allows us to do some really cool stuff!
Setting up Exploit Environment
Now, we need a rooted Android device, so that MobSF can upload “frida-server” binary to the device’s /system folder. You can use a physical rooted Android phone and MobSF will detect it just fine, but there are some caveats, for e.g, MobSF only supports Android devices with API level <=29. So, a rooted android device with newer API level won’t work. Which is why, I recommend the free solutions like Genymotion and Android Studio to create an Android VM/AVD.
Note:- There are MobSF restrictions on the above emulators too, for e.g, Genymotion Android VMs upto Android API level 29 and Android Studio AVDs upto Android API level 28 are currently supported.
Now, to follow along with this guide, do one of the two following things(ignore this if you’ve already done):-
- Follow the Get Started guide for Genymotion and setup an Android VM with API level <=29. This is what I’ll be using for this guide.
- Install Android Studio, then create an Android AVD following this guide, remember to create an AVD with API level <=28. Then follow this guide from me to setup it for MobSF. You can also refer official MobSF Docs but I’m the maintainer of MobSF snap package, so I only suggest exactly what’s necessary.
Now, there are two methods to solve this challenge with Frida:-
- Write the exploit script and use frida-tools to exploit the Android app using the CLI and solve the challenge.
- Use MobSF’s “Dynamic Analyzer” which has “Frida” built into it and do everything using GUI! I think this is a very beginner friendly way of solving this challenge and spares us the complications of setting up Frida. This is what we’re going to do.
So, now when you click on the “DYNAMIC ANALYZER” button on the top navigation menu of MobSF,
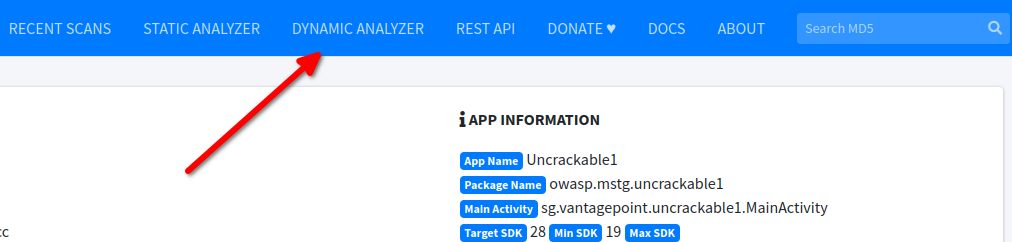
then if you are not running an Android VM, MobSF will show an error like the following:-
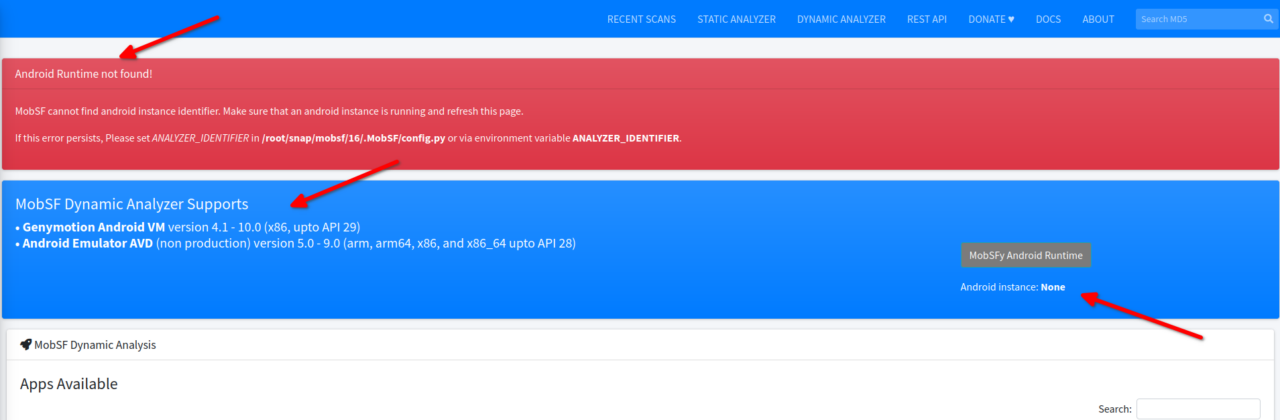
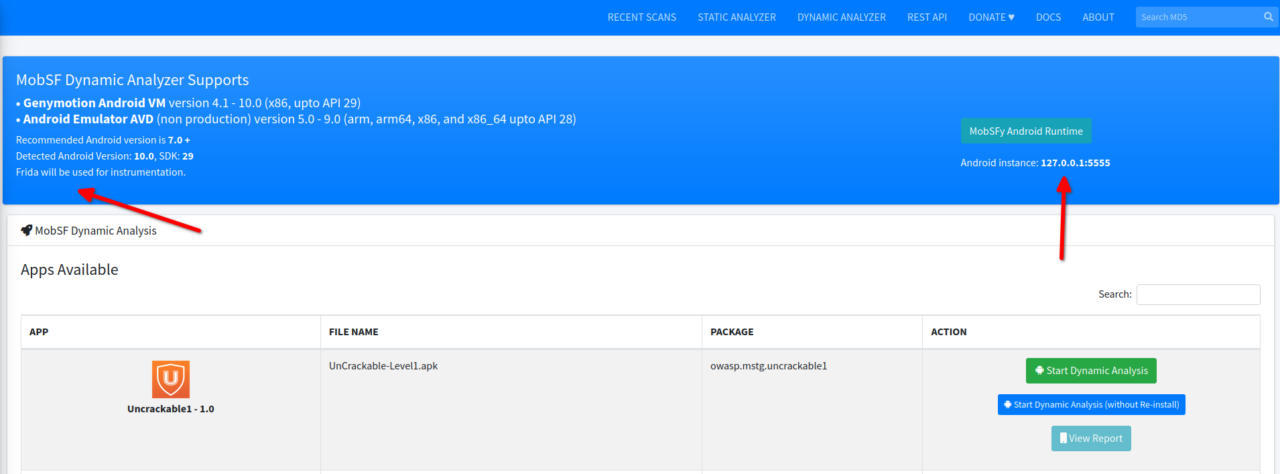
There is nothing to worry about and this error just means that you’re not running the Android VM and you just need to start it and MobSF will automatically detect it. If you’re already running an Android VM, then you’ll see something like this:-
TIP:- You can also start Dynamic Analyzer by clicking “Start Dynamic Analysis” from the left hand side menu in Static Analyzer window.
As you can see MobSF itself mentions that Frida will be used for instrumentation. Next, click on the “Start Dynamic Analysis” button and you’ll land on a screen like this:-

TIP:- Don’t forget to look at the MobSF output in the terminal, it’ll tell you what’s happening in the background while it’s processing in the GUI.
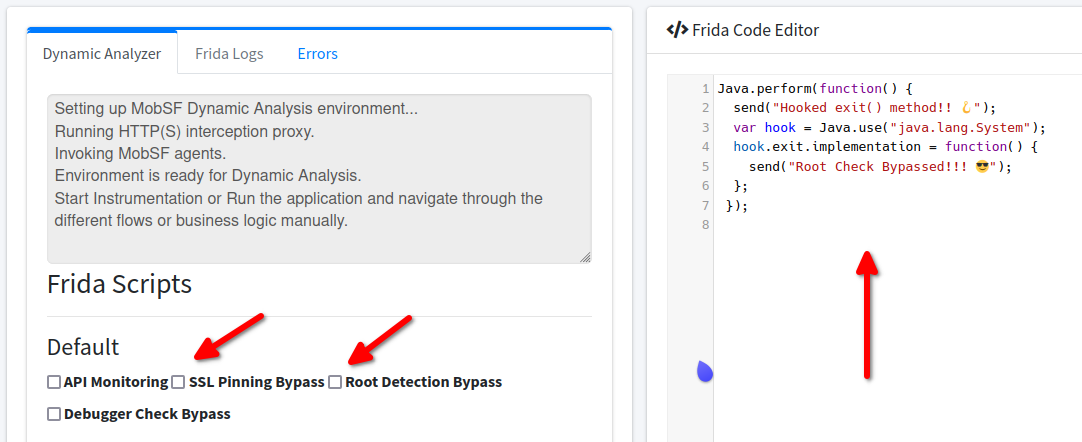
There are a whole lot of options here for us to do extensive security tests on Android apps. I recommend playing with them using different Android apps to improve your knowledge, but what’s of interest to us is the “Frida Code Editor” on the right-hand side, where we will put our Javascript code to hook the function I mentioned in Static Code Analysis. Now, there is a little problem with UnCrackable-Level1.apk. It has a mechanism to detect if the Android device is rooted and it’ll exit the app on startup if it detects the Android device is rooted.
If we check the Java Source code again, we’ll see that the MainActivity class inside sg/vantagepoint/uncrackable1/MainActivity.java file has this code:-
package sg.vantagepoint.uncrackable1;
import android.app.Activity;
import android.app.AlertDialog;
import android.content.DialogInterface;
import android.os.Bundle;
import android.view.View;
import android.widget.EditText;
import owasp.mstg.uncrackable1.R;
import sg.vantagepoint.a.b;
import sg.vantagepoint.a.c;
/* loaded from: classes.dex */
public class MainActivity extends Activity {
    private void a(String str) {
        AlertDialog create = new AlertDialog.Builder(this).create();
        create.setTitle(str);
        create.setMessage("This is unacceptable. The app is now going to exit.");
        create.setButton(-3, "OK", new DialogInterface.OnClickListener() { // from class: sg.vantagepoint.uncrackable1.MainActivity.1
            @Override // android.content.DialogInterface.OnClickListener
            public void onClick(DialogInterface dialogInterface, int i) {
                System.exit(0);
            }
        });
        create.setCancelable(false);
        create.show();
    }
    @Override // android.app.Activity
    protected void onCreate(Bundle bundle) {
        if (c.a() || c.b() || c.c()) {
            a("Root detected!");
        }
You see in the above code on line 17 the create.setButton function uses the android.content.DialogInterface.OnClickListener interface to listen for click by the user on the OK button. If the user clicks the OK button, then on line 20 the java.lang.System.exit() method is called and the app exits with status code 0. We need to hook this exit() method and remove it so that the app doesn’t exits on clicking OK!
Writing the exploit code
Now, if you’ve some past development experience it’d easy for you to figure out how to write the Frida JavaScript exploit code. I’ll try to explain the code I’ve written so that you can easily follow along, but do keep in mind that writing your own exploit code is a very essential skill to learn if you want to do anything with Frida. So, the code we’ll be using to bypass root check is:-
Java.perform(function() {
  send("Hooked exit() method!! 🪝");
  var hook = Java.use("java.lang.System");
  hook.exit.implementation = function() {
    send("Root Check Bypassed!!! 😎");
	};
});
Now, everything I’ve used in the above code is from Frida JavaScript API reference and you need to refer it to understand this code. You can learn about methods used above by specifically referring Java Instrumentation documentation in the API reference. The send() method on line 2 sends a message to MobSF to print it in logs. You can think of the send() method as a print() function. Next the Java.use creates a JavaScript wrapper for the Java class java.lang.System which contains the exit() method. Here, I stored it in variable hook. In the next line I took the implementation of the exit() method in the Android App and modified it to print a message instead of exiting the app! So, now when you click the OK button in the app, it won’t exit and instead print a message in MobSF logs. You see, easy peasy!
Now, in Dynamic Analyzer, paste the above code in “Frida Code Editor” and uncheck all the Default Frida Scripts which are enabled, as they’ll output unnecessary messages to the logs.
TIP:- It really helps a lot if you’ve an extra monitor!
After that click on the big green “Start Instrumentation” button and it’ll launch the Android app in your Android VM/AVD. Now, click the blue button “Frida Live Logs” besides the green button and you’ll see the following:-
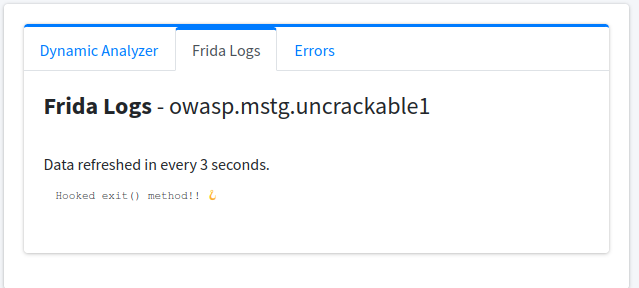
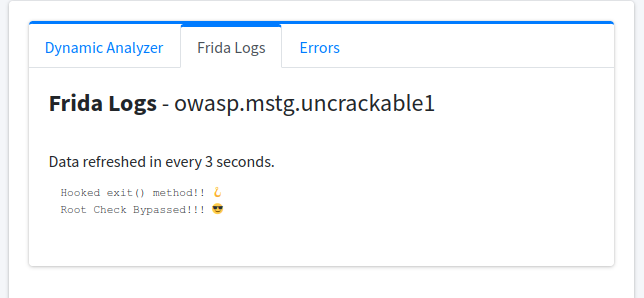
This means our code is working and it printed the necessary message. Now, in your Android VM click the “OK” button and if it didn’t exit the app and instead printed a message to log, then we’ve successfully hooked the exit() method and bypassed root check!
Now think, wouldn’t it be great if we did something similar, as we did just now, for the decryption function I explained in “Static Code Analysis” and print the decrypted string to MobSF logs? Yup, that’s what we’re going to do. So, this is the code to print the decrypted string:-
var hook2 = Java.use("sg.vantagepoint.a.a");
hook2.a.implementation = function(bArr1, bArr2) {
  var result = this.a(bArr1, bArr2);
  var secret = '';
  for(var j = 0; j < result.length; j++) {
    secret += String.fromCharCode(result[j]);
  }
send("Secret String: " + secret);
return result;
};
This is similar to what we did before. We created a JavaScript wrapper for sg.vantagepoint.a.a class, which is the class I explained in “Static Code Analysis“. Then we hooked it’s “a” function which takes two byte arrays as arguments. In the next line, I created a variable “result” to store the decrypted string returned after the function executes. Next, JavaScript String.fromCharCode function is used to convert to string each element of “result” Array. Next, I printed out the secret and finally I’ve to return value of “result” to resume the normal flow of the app, otherwise it will crash if it didn’t get the result to compare with the user provided string.
It’s Game Time!
So, the final exploit code is:-
Java.perform(function() {
  send("Hooked exit() method!! 🪝");
  var hook = Java.use("java.lang.System");
  hook.exit.implementation = function() {
    send("Root Check Bypassed!!! 😎");
    var hook2 = Java.use("sg.vantagepoint.a.a").a;
    hook2.implementation = function(bArr1, bArr2) {
      var result = this.a(bArr1, bArr2);
      var secret = '';
      for(var j = 0; j < result.length; j++) {
	  secret += String.fromCharCode(result[j]);
      }
      send("Secret String: " + secret);
      send("---------------^^^^^^^^^^^^^^^^^---------------");
      return result;
    };
  send("Hooked sg.vantagepoint.a.a.a!! 🪝");
  };
});
Now, just like we did before click on “Start Instrumentation” and check “Frida Live Logs“. After you click OK in the app, enter any random string in the input field in the app or just leave it blank and click “VERIFY” button. When you click the button, as expected it’ll decrypt the Secret string to compare with user provided string. Next, if you look into Frida logs, you’ll see the decrypted string. Challenge solved!!!
Conclusion
This was a great opportunity for me to demonstrate some super cool Android Hacking tools. Yet, I can assure you that I’ve only scratched the surface of what else you can do with MobSF! For e.g, it has http-tools built into it to provide you a quick proxy for working with BurpSuite or OWASP ZAP, and that is just one of the tons of cool features it provides. I highly recommend you play with it more to learn all the different features it provides to make Android Penetration Testing super easy for you. Also, solving this challenge really pumped up my Frida game and I loved the way I went from getting tensed by looking at Frida JavaScript code to becoming good enough to write my own! By the way, this challenge gave me an opportunity to improve my Java game and now I think I can easily audit any Java program. All in all, solving this challenge was a really rewarding experience!
Also, I understand that writing code is a bit above beginner level, which is why I’ve included another solution which doesn’t requires writing any code. Still, I’d recommend this Frida solution to anybody, as this is what you’ll commonly need in real world Android Reverse Engineering. Now, if you liked this blog post and want to really get into the world of Android Hacking, then I highly recommend reading the OWASP Mobile Application Security Testing Guide. It contains a lot of the basics you need to get started. Happy Hacking!
Solution 2: Using Java Debugger (jdb)
If you read my blog posts, then you probably know how much I love doing everything via CLI over GUI. You can consider MobSF as an exception to my “CLI only” rule, as it’s really good at what it is created for! I could’ve done the same debugging I’m going to explain using Android Studio, but as the MobSF solution is all GUI based, so I decided to show some CLI hacking and used jdb instead.
Note:- Before we begin, I’d like to point out that this solution using jdb is not as cool or efficient as the MobSF one and involves some repetitive tasks. Still, I’ve tried to automate some of it.
A little intro to JDB
The Java Debugger(jdb) uses the Java Debug Wire Protocol(JDWP) to debug a Java Virtual Machine(JVM), i.e in our case an Android app. In short, jdb is a JDWP debugger. JDWP is also supported by all Java IDEs that allow you to set breakpoints on Java code, step through them or do basic tampering. JDWP is a great protocol when it comes to debugging Java Programs(Android apps) that don’t use native libraries, i.e programs that ship with important part of their code in shared object libraries, e.g the *.so libraries in Linux(We’ll see something similar in UnCrackable Level 2). TL;DR, jdb is great for debugging simple Java programs, as is our case.
Installing Required Packages
The jdb binary is included with Android Studio and if you’ve installed it then you can find it in the android-studio/jbr/bin/ directory. The jdb binary is included in the OpenJDK Development Kit packages, i.e openjdk-*-jdk packages of Debian based Linux distros and to use it you’ve to install the necessary package. I’ll be using the distro provided package. To install your distro provided jdb use the following command:-
sudo apt install default-jdkNote:- You can also install a package by specific version, e.g. for Java 17 you can use openjdk-17-jdk.
Setting up pre-debugging environment
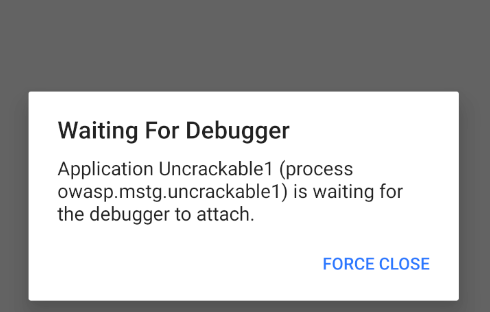
From the first solution, we know that on startup the MainActivity class of the app detects root and instantly exits on clicking OK. In first solution, we bypassed this by hooking the exit() method on startup, i.e before the method has even loaded. This means that we’ve to attach the debugger before any method/function in the app loads on startup. Now, Android “Developer options” has a mighty handy option called “Wait for debugger” which waits for a debugger to connect with the debugee(Android app) before executing any methods.

You see, Android provides exactly what we need for our situation. Now, you can open your Android VM/AVD’s settings app and go to “Developer options“, then choose our Uncrackable1 app in “Select debug app” and turn on “Wait for debugger” and the app will wait for a debugger to connect like this image:-
But, I prefer doing things via CLI, so that I don’t have to move from the keyboard while doing debugging in the terminal. If you want to do the above via terminal, then refer the following, otherwise ignore it.
To set a debug app, we need its package name which we can get via command line using adb. To get the package name start the Android VM/AVD, then issue the following command:-
Note:- You can get a shell on the Android VM/AVD with adb shell and run the following commands from there, but I prefer working from the comfort of my Linux Host’s shell.
adb shell pm list packages uncrackable
Once you’ve the package name you can set it as a debug app and turn on “Wait for debugger” for the app with this single command:-
adb shell am set-debug-app -w --persistent owasp.mstg.uncrackable1TIP:- You can also remove a debug app with adb shell am clear-debug-app
Now, you can click on Android app icon to launch it or better yet you can launch it from the terminal. To launch it from the terminal we’ve to know the name of the app activity responsible for launching the app. To find out the name of that activity, use the following command:-
adb shell pm resolve-activity --brief -c android.intent.category.LAUNCHER owasp.mstg.uncrackable1 | tail -n1Note:- am stands for Activity manager and pm stands for Package manager.
Once you get the activity name, use following command to launch the app:-
adb shell am start -n owasp.mstg.uncrackable1/sg.vantagepoint.uncrackable1.MainActivity
I know this is not absolutely necessary, but as you can see from the image above how much the workflow speeds up with zsh‘s autosuggestion. Often times the app will crash while debugging and you’ve to launch it again from the Android VM, in that case launching it from CLI will save you some time and effort. If you’re a command line person like me, then you’ll find this useful in the long run.
Attaching app process with jdb
First, we’ve to know the process ID of the UnCrackable app to debug it using jdb. The command adb jdwp lists all debuggable processes running in the Android VM/AVD, but we can use a simple ps to list the required process ID. Start the UnCrackable app and use the following command to get it’s process ID:-
adb shell ps -A | grep owaspThe value in second column of the output is the “process ID”. We can now use adb forward command to forward TCP connections on a local port on our host to Uncrackable app using JDWP. To do this, use the following command after replacing <process ID> with the process ID from above command:-
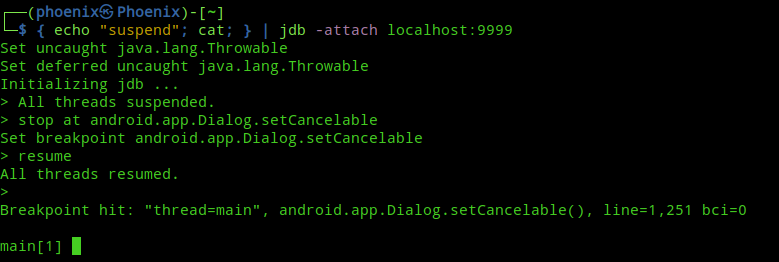
adb forward tcp:9999 jdwp:<process ID>Now, we can attach jdb to the UnCrackable app, but the problem is attaching jdb directly will resume the app, which’ll execute it’s functions and detect the device is rooted and the app will exit on startup. So, we’ve to suspend all running threads in the app to prevent it from running. To do this, use the following command:-
{ echo "suspend"; cat; } | jdb -attach localhost:9999
Once attached to the suspended process, you can type help or ? to get list of all available commands. I recommend taking a look on the available commands. The commands we’ll need for this solution are:-
- locals: print all local variables in the current stack frame
- stop <at|in> method: set a breakpoint on a method
- clear method: clear a breakpoint on a method
- resume: resume all suspended threads in the program
- set <lvalue> = <expr>: assign new value to a variable element
- cont: continue execution from breakpoint
- monitor <command>: execute <command> each time the program stops or hits a breakpoint.
Note:- To list all currently loaded classes, you can use the classes command.
Exploiting with jdb
Now, just like we hooked exit() method in the first solution, we can set a breakpoint on it but we cannot modify the method itself with jdb. The exit() method takes only one argument as an integer, i.e the exit status code. As per documentation of the Java System.exit() method, using a nonzero status code will result in abnormal termination of the app, which means using anything else as argument will exit the app. So, we cannot use this method for our purpose. Note, if you didn’t understand what I just explained, then read along and everything will become clear to you. Now, it’s time to take a visit to the MainActivity class again and check if we can change anything else to get rid of the Dialog.
public class MainActivity extends Activity {
    private void a(String str) {
        AlertDialog create = new AlertDialog.Builder(this).create();
        create.setTitle(str);
        create.setMessage("This is unacceptable. The app is now going to exit.");
        create.setButton(-3, "OK", new DialogInterface.OnClickListener() { // from class: sg.vantagepoint.uncrackable1.MainActivity.1
            @Override // android.content.DialogInterface.OnClickListener
            public void onClick(DialogInterface dialogInterface, int i) {
                System.exit(0);
            }
        });
        create.setCancelable(false);
        create.show();
    }
You see in the MainActivity.a method an AlertDialog is created and as I explained before, clicking the OK button results in the app’s exit. But, if you see on line 12, the android.app.Dialog.setCancelable method is used with “false” as argument to prevent anyone from cancelling the Message box. If we can set a breakpoint on this method using jdb and change its argument to “true” from “false“, then we can cancel the Message box without having to click OK. To do this we’ve to set a breakpoint on the method. In jdb console use the following command:-
stop at android.app.Dialog.setCancelableNow, you can resume the loading of the app with the resume command:-
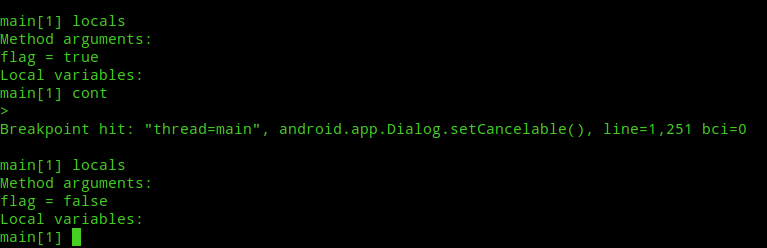
As you can see, resuming the app resulted in it trying to load the Message box, thus executing the first instruction of android.app.Dialog.setCancelable method and hitting our breakpoint. Now, list the arguments passed to the method with the locals command:-
localsThe first time you run the locals command it may or may not load our desired instruction of android.app.Dialog.setCancelable with the value of “false“. As you can see in the image below, the first time I ran locals command the flag was set to true instead of false as we know from the code. Next, typing cont and using locals again resulted in the right argument.
Now, you’ve to change the argument value from false to true using “set flag = true” and continue until the Message box is shown. After that the Message box should be cancelable.
Now, to get the decrypted string we need to set a breakpoint at a place where it is passed after getting decrypted. Using the sg.vantagepoint.a.a.a method as we did in first solution won’t work and will ask us to enable compile time debugging support to get local variables information.
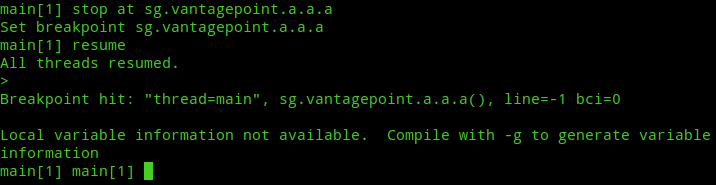
Same also applies for sg.vantagepoint.uncrackable1.a.a method. This’ll require more work to do to set it up for debugging. But, if we look at the code again, we’ll see that the sg.vantagepoint.uncrackable1.a.a method uses the java.lang.String.equals method to compare the decrypted string with the user provided string!
So, the decrypted string must be stored at some instruction of java.lang.String.equals method. We can do a little bruteforcing and read all the variables one by one for each call to the method until we reach our desired decrypted string. Now, we can follow the same method we used for setCancelable and repeat our process until we get the string, but typing cont and then locals everytime is bit of a pain. So, you can automate the locals command using monitor locals command, which’ll execute locals each time the program stops or hits a breakpoint!
Note:- You’ve to click on “VERIFY” button, so that the equals() method loads for string comparison.
As you can see, this is not a very efficient method and requires a little bruteforcing until we get the decrypted string. You can automate the cont command too with monitor cont, but it’ll start a loop and even though it’ll give you the secret string, you’ll have to force exit jdb.
Conclusion
There is already an official solution available using jdb in OWASP MASTG and I recommend you go through the entire “Android Tampering and Reverse Engineering” chapter to learn more about Android Reverse Engineering. Now, debugging with jdb is great, but it has limitations. If you really want to dive into extensive debugging of Android apps, then use Android Studio instead. Android Studio provides a powerful debugger for Android with lots of features including logcat in GUI! Android Studio also includes the DDMS which has a powerful Java method tracer as mentioned in MASTG, but I’ve not tested it yet. Now, you should know that I’ve been playing with Android Security on and off for more than four years now, and I’ve been tinkering with Android devices far longer than that, which is why complicated software related to Android comes easily to me. I may not know how to use every Android Hacking tool out there, but if I need to, then I can master any tool over an weekend. That being said, writing about this challenge filled some of the knowledge gaps I’d about Android security and it was really a great experience for me. I hope someone finds this useful.
Thanks for reading. Peace!